Friday, March 4, 2011

Chocolate Turtle Cheesecake


I think we can all agree that it's hard to know what to get dads on gift giving holidays. And no matter how much my dad actually loves getting socks, I still feel like a schmuck every fathers' day, birthday and Christmas as he opens his gift and feigns surprise. "Just what I wanted! Socks! I was afraid you were going to break from tradition and get me something else this year..."

Which is why it's nice be able to hand him an additional package, one that I can identify with desiring. Dad's favorite candy is the delicious chocolate turtle.
photo from Demet

Chocolate covered-caramel smothered-toasted pecans are dad's idea of a good time. And if we're lucky, he'll gift us with one chocolate turtle each.

We can only assume they're called turtles because of the vaguely turtle shape... although if I ever see turtles that look like this in my local pond, I'm going to have serious questions for our waste management center.


While I'm of the opinion that nuts ruin many a perfectly good dessert, I think this is a pretty winning combination. It's an incredibly easy way to dress up a dessert, too, just add chocolate, caramel and pecans. Plain old vanilla ice cream becomes a turtle sundae! Chocolate cake gets a turtle makeover! Turtle brownies! And the reason we're here today: Turtle Cheesecake.

I think a lot of people are intimidated by cheesecakes because of the long bake time, the longer cool and chill time and the very real risk of crackage. However, a cheesecake is pretty non-fussy when compared to cakes and tarts. After the crust, it's just mix-and-go! The only secrets are planning ahead and a water bath. I now use a water bath every time and cheesecake fissures are a thing of the past. And the beauty of the turtle cheesecake is that even if there are cracks, they're hidden under the turtle topping.

Turtle Cheesecake, recipe adapted from Dorie Greenspan and Emeril Lagasse

Preheat the oven to 325 degrees.
First, prepare the crust:

2-3 cups finely crushed oreos (depending on how thick you like your crust) (a food processor makes this so easy!)
6-10 T melted butter (don't over-do the butter when it comes to an oreo crust. Add it until it just sticks together when you pinch the crumbs, before it looks all moist.)

Combine the butter and the oreo crumbs, then press the mixture to the sides and bottom of a springform pan. Bake the crust for 10-15 minutes. Let it cool while you make the cheesecake filling.

Filling Ingredients:

2 pounds cream cheese, room temperature
1 1/3 cup sugar
4 eggs
1/2 tsp salt
1 1/3 cup sour cream or heavy cream, or a combination of the two
1 tsp vanilla
1 cup semi sweet chocolate chips or (preferably) roughly chopped dark chocolate

Place a pot of water on the stove to boil for the water bath. Get out a baking or roasting pan large enough to fit the springform pan.

In a stand mixer, using the paddle attachment, mix the cream cheese until smooth. Scrape down the sides of the bowl, add the sugar and mix a minute more (the smoother this batter is, the better). Scrape down the sides and add the vanilla and eggs, blending well between each addition. Finally, add the salt and heavy or sour cream and mix until smooth. Stir in the chocolate chips.

Pour the cheesecake filling into the crust and smooth the top. It's a good idea to put aluminum foil around the bottom and sides of the springform pan to make sure that no water leaks in and makes your crust soggy. Put the cheesecake into the baking pan and pour the hot water around it so that it comes half way up the sides of the cheesecake pan.

Bake the cheesecake at 325 for about an hour and a half, until set. You can tell its set because if you shake it, the whole surface moves only slightly, opposed to the middle still jiggling. Turn off the oven and let it cool with the door propped open, still in its water bath, for about an hour. After the hour, place the cheesecake on a rack to come to room temperature. (When I'm feeling lazy but have some time, I'll take the cheesecake out of the oven after baking and let it come to room temp in the water bath.)

Chill the cheesecake in the fridge for at least four hours, preferably over-night.

Before serving, make the topping.

1 cup semi-sweet chocolate chips
3/4 cup heavy cream
2 cups pecan halves or chopped pecans, toasted
1 cup caramel sauce*

Pour the cream over the chocolate and microwave for about 45 seconds. Let sit for a minute and then whisk until smooth. Pour it over the cheesecake. Let set in the fridge for 10 minutes. Finally, sprinkle the top with the pecans and drizzle the caramel sauce over the whole thing.

*You can used a jarred caramel sauce, but of course I recommend making your own. Here's a great recipe.


You can find this and more treats over at sweets for a saturday.

Wednesday, March 2, 2011

Caramelized Bread Pudding with Cinnamon and Chocolate


Oh my gosh! So many people are getting married this summer! I'm estimating that we will attend at least 6 weddings this spring/summer...it's starting to remind me of the summer after college when all my friends tied the knot. I spent all my savings on gifts and bridesmaid dresses that summer.

Don't get me wrong, weddings are a blast and I'm so excited for all of our almost-married friends, but your boss starts looking at you funny when you tell him you'll need another weekend off for - "Let me guess, Mikaela. A wedding." Yup.

And that's not even the craziness thing that's happening...even crazier is that the first round of friends to get married? The ones from the summer after college? They're starting to have BABIES. Mind-blowing. BABIES. Inconceivable.

We want kids, lots of them even, but as we always say...just not right now. Sorry mom.

That said, I'll tell you what we do want right now, what marrieds and singles and parents and children all want right this very minute, even if they don't know it: We all want BREAD PUDDING.

Specifically we all want this bread pudding, and that is because it has a very high custard-to-bread ratio. Nothing is more disappointing than dry, clunky bread pudding, but I'll give you the secrets to bread pudding nirvana:

1. Chocolate layer on the bottom.
2. Only one layer of bread, smothered with butter.
3. A veritable waterfall of custard.
4. Hints of cinnamon and nutmeg.
5. And...wait for it...a caramelized top. That's right. You brulee the top before serving. Could this get any better? No! I attest it could not.

This layered bread pudding is a FANTASTIC respite from the dense bread puddings that seem to have been made from pureed bread.

The recipe is adapted from Suzanne Goin's Sunday Suppers at Lucques, phenomenal cookbook filled with recipes for entire meals organized by season. Every recipe is pure gold.

There's also a helpful video of Suzanna Goin making this bread pudding at Martha Stewart's website.

Caramelized Bread Pudding with Chocolate and Cinnamon

2 T unsalted butter, softened
5 slices brioche or white bread, crusts removed
3 egg yolks
3 eggs
1/4 cup brown sugar
1 1/2 cup heavy cream
1 1/4 cup whole milk
1/2 tsp cinnamon
1/4 tsp nutmeg
1/4 t salt
1 cup dark chocolate, chopped or chips
plus about a tablespoon of sugar for the caramelizing

Preheat the oven to 350 degrees. Sprinkle the bottom of a 9x9 baking dish with the chocolate.

Butter one side of each slice of the bread, cut it into quarters, and layer on top of the chocolate. The edges of the pieces should overlap a bit, but there should be only one layer of bread.

Whisk the eggs and egg yolks with the brown sugar, then whisk in the cream, whole milk, cinnamon, nutmeg and salt. Pour the custard over the bread slices, and use your fingers to push down on the bread slightly to make sure it's not dry anywhere.

Place the bread pudding baking dish into a roasting pan and into the oven. Fill the roasting pan with boiling water so the water comes half way up the side of the bread pudding dish. This will help it cook evenly and keep the custard smooth.

Bake for 1 hour 15 minutes until the bread is slightly puffed up and the custard is set. Let cool for 10 minutes, then sprinkle the top of the bread pudding with sugar and caramelize with a torch or under the boiler. If using the boiler, watch it carefully so it doesn't burn and the custard doesn't curdle.

Scoop out of the pan with a large spoon to serve, making sure you get all of the yummy chocolate on the bottom.

Mmmm, enjoy. Seriously, this is so good I want some right now...I know what I'll be making at the restaurant tomorrow!

Sunday, February 27, 2011

New Fox Navigation Buttons!

Wooohoo! Please take note of the shiny foxy new buttons over there on your right! You may now take a stroll through my site via little foxes! If you're viewing this post in a reader, please take this opportunity to come to thefoxfix.blogspot.com to view the new site design.

It turns out I was complicating things for myself. I was googling questions like crazy, trying to mess with the html- when blogger had me taken care of the whole time. They offer the option of placing images on your sidebar with links attached. Instant buttons! I just drew my images, scanned them, sized them to 125 pixels across, and installed them as gadgets with links to my different pages. Easy peasy.

If you're having any trouble with this aspect of your blog, you can shoot me a question in the comments- I'll try to answer.

Friday, February 25, 2011

Blackout Cake


Hello! I'm sure returning readers will notice the dramatic change in header. As much as I liked my ravenous fox, I wanted something simpler, and I was kind of sick of the lettering. Also no more "magical" bakeshop. Sorry folks, seek your elixirs and concoctions elsewhere.

For posterity's sake, here is the old header:

I'm fiddling around with the design of the rest of the blog, trying to figure out how to replace the words/links in the sidebar and navigation bar with little hand drawn words and foxes. I'll let you in on a secret: I'm no great shakes at computer stuff. (I'm 25, btw, I guess I should be good at computers.) So if anybody knows how to do the custom buttons, for heaven's sake please let me know- its proving difficult.

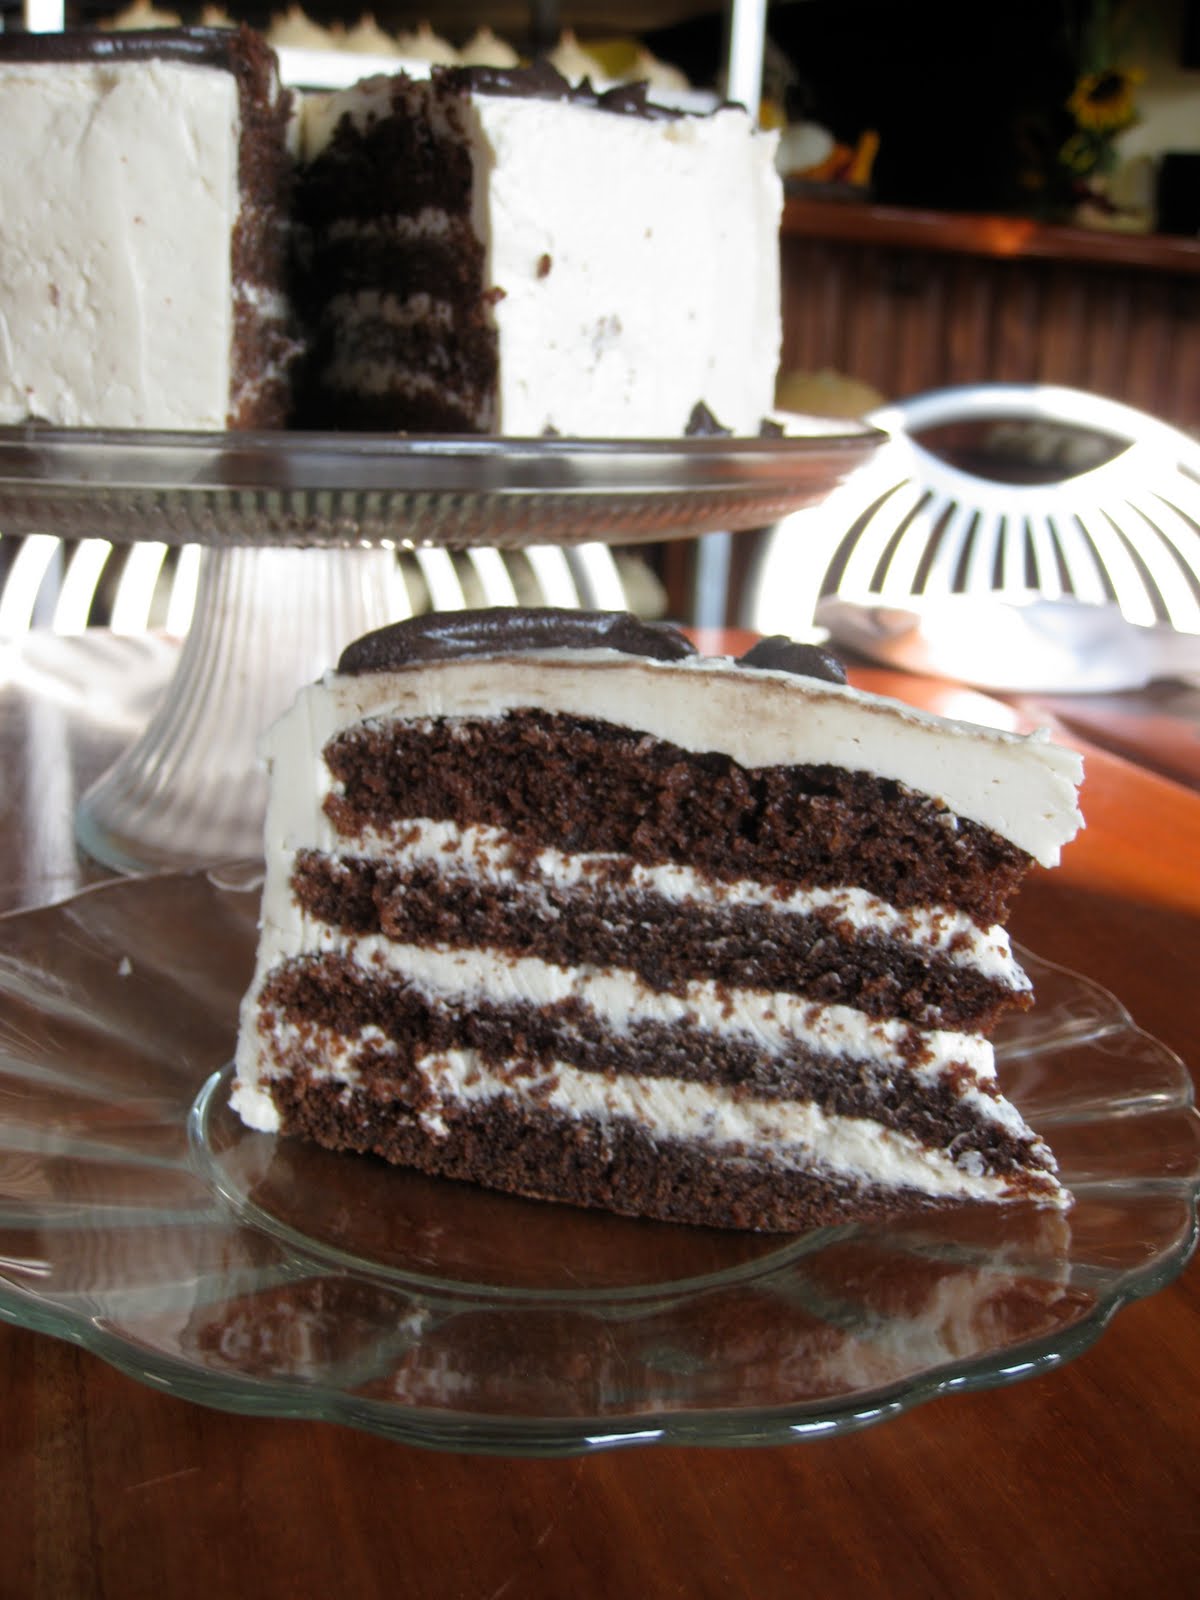
So soon I'm going to gift you with a post that includes a list of the frostings you should definitely have in your repertoire. Silly me, I used to think frosting was just powdered sugar and vanilla and butter beaten together, (this was after I realized that there is life beyond canned frosting, which I am not knocking- rainbow chip frosting is soooo gooood). It turns out that there are so many options and techniques when it comes to frosting! I've written about most of them before so I can just link to those posts, but there's one I've neglected to tell you about. I've been holding out on you, it's true, but no more I say! I'm here to tell you about BLACKOUT CAKE with DENSE SMOOTH DELICIOUS Blackout frosting.


The point of a blackout cake is to be incredibly dark like impenetrable night. It's often called a "Brooklyn" blackout cake, presumably because there are blackouts in Brooklyn...? Hold on, let me google this.

Oh, there's lots of info on this. Apparently the cake was developed by Ebinger Bakery in Brooklyn, NY during WWII when there were, in fact, blackout drills. Every residence had to cover their windows so no light escaped and enemy planes couldn't see where to bomb-specifically where to bomb boats leaving the harbor. It was a chocolate cake with chocolate pudding filling and frosting finished with chocolate cake crumbs on top. Yum, right? Info came from this site.

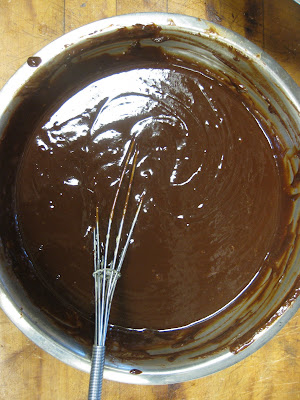
This frosting is not pudding, it's much denser, with an intensely chocolate flavor. It's made with eggs, so it's very rich and the frosting stays soft even when kept in the refrigerator. This is a plus at the restaurant because all the cakes are kept in a chilled case. Basically, its brownie batter without the flour. So it tastes freaking AMAZING. I first saw it on the Oprah website, a recipe from the Chocolate Room in Brooklyn. Which I've been to and had hot chocolate, by the way. Here is my version of a Blackout Cake.


You will make the Martha One Bowl Cake from the Mocha Chocolate Cake post while the frosting is cooling.

Blackout frosting, adapted from the Chocolate Room cafe via Oprah

20 oz dark chocolate, chopped. (or chips)
3 1/4 sticks butter, cut into 1/2 inch pieces
1 1/2 cups sugar
dash salt
8 eggs
instant thermometer or candy thermometer.

Pour a couple of inches of water in a pot and heat over medium heat. Place the chocolate and butter in a heat-proof bowl and set it over the simmering water, stirring occasionally, until the butter and chocolate are melted and completely combined. Set aside.


Crack the eggs in another heat proof bowl, then add the sugar and salt and whisk thoroughly. Place the bowl over the same simmering water and heat, whisking constantly, until the temperature reaches 160 on an instant thermometer. This is the only tricky part- keep whisking or it is HIGHLY LIKELY that the eggs will start to curdle. If the eggs do curdle a little, all is not lost- you can blend the eggs with a blender or an immersion blender to make them smooth again.

Strain the egg mixture into the chocolate mixture using a fine-mesh strainer. Whisk to combine. Let the frosting cool slightly (it will be very runny) and then put it in the fridge for 2 hours, stirring occasionally, until it is thick and spreading consistency. Taste it often- this frosting is finger-lickin good.

Swirl onto your cake and enjoy every bite.

Tuesday, February 15, 2011

Lunch

Mmm... West African Groundnut Stew with Tartine Bread.


Stew from Sundays at Moosewood Restaurant, recipe found here. My subs: carrots instead of okra, add 1 t coriander, 1/2 t cumin, 1/4 t of cinnamon, tumeric and cardamom. DIVINE. So good for winter, served over brown rice or with rustic bread. (although this week it's in the 60's and 70's here, what???)

Friday, February 11, 2011

Mocha Chocolate Cake


Today, dear readers, you will receive two very valuable recipes. I use these recipes at least twice a week at the restaurant, so pay attention please, and you will produce some pretty amazing cakes in the future.


I've found that some of my favorite chocolate cake recipes in look, texture, ease and flavor have been cakes made without butter. (Shocking, I know.) Extra points if the cake includes sour cream. One fave is the chocolate layers from the Triple Fudge Cake from Sky High, and then there's the sour cream chocolate cake from Sky High. (I highly recommend both of these.)

However, more often than not, I turn to Martha's One Bowl Chocolate cake. (Absolutely. Fool. Proof. The other day, I accidentally left out 1/4 of the flour- it still tasted great.)


I usually pair this type of ultra moist, dense cake with peanut butter, caramel or mocha frosting, but it its the last of these we are here to talk about today.

Friends, do I have your attention here? This is important. This will be one of the most important frosting recipes you will ever make. It's incredibly light and creamy, and not too sugar or buttery.

Let me explain this way: you know the kids who lick the frosting off the top of their cupcake? Maybe you were/are that kid. Well, those kids always disgusted me. There's nothing I hate more than an imbalanced cake/frosting ratio- too much frosting and it's not worth eating. If ever I go to Gigi's cupcakes, I have to knock off half the frosting before I begin. Have I made my point? Not yet, because here it is- if that sugary buttery nasty frosting was replaced with this frosting, the one I'm about to tell you about, then I would be the first person to be holding a bald cupcake- licked clean.

It's that good. Really the only "white-type" frosting you'll need, because you can flavor it with pretty much anything- vanilla, mocha, mint, lemon, almond, jam, coconut, whatever. I think that, with a very few exceptions, you need a good chocolate frosting recipe (maybe two), a cream cheese frosting recipe, and this frosting recipe. Then you're set for life.


Okay, enough talk, here are the recipes:

One Bowl Chocolate Cake

Ingredients:
1 1/2 cups unsweetened cocoa powder (I love the Hershey's dark chocolate cocoa)
3 cups AP flour
3 cups sugar
1 tablespoon baking soda
1 1/2 teaspoon baking powder
1 1/2 teaspoon salt
3 large eggs, beaten
1 1/2 teaspoon vanilla extract
1 1/2 cups buttermilk (or pour 1 1/2 tablespoons vinegar in the bottom of your measuring cup, fill up to the 1 1/2 cup line with milk, stir and let sit for 5 minutes- voila! buttermilk!)
3/4 cup vegetable oil
1 1/2 cups warm water

Preheat the oven to 350 degrees. Spray 3 8 or 9-in round cake pans with cooking spray and line with parchment rounds.

Sift together the flour, sugar, cocoa, salt, powder and soda. Stir to make sure the ingredients are evenly distributed. You can make this recipe with your mixer or with plain ol' elbow grease.

Stir in the buttermilk, vanilla and eggs until there are no lumps and the batter is the consistency of brownie batter. Scrape down the sides of the bowl. Next stir in the oil and finally, the water. Stir, mix, whatever, scraping occasionally, until smooth. It will be thinner than most cake batters, but fear not- it bakes up wonderfully.

Divide the batter evenly between your three pans, and bake until a knife inserted in the center of the cake comes out clean. For 9-in pans this will take from 25-35 minutes, 8-in will take a little longer. Let the cakes cool for 20 minutes before removing them from the pans to cool completely on racks. Confession: sometimes I let my cakes cool completely in the pans. I do what I want, pow.

Time for that frosting. It's rather unconventional in its method, which for me makes it that much better. It's like a secret formula- like alchemy. I found the original here, on Tasty Kitchen. Here's my version, which is just doubling the original and adding expresso.

Ingredients:
2 cups milk
10 tablespoons flour
2 cups sugar (granulated- NOT powdered)
1 pound (4 sticks) butter, room temperature
1 teaspoon vanilla
Approx 6-9 tablespoons espresso, to taste. You could use instant espresso, or very, very strong coffee, too. It can be lukewarm, but not hot.

Pour the milk in a small or medium saucepan and place over medium heat. Whisk in the flour, one tablespoon at a time, trying to avoid clumps. Whisk constantly until the mixture thickens. It will be quite pasty, thicker than cake batter. (Don't take it off the heat before its ready- of the mixture is too thin the frosting will FAIL.) Remove from the heat and let cool, stirring occasionally.

flour/milk paste/gravy

While the paste is cooling, put the butter and sugar in the bowl of a stand mixer fitted with the whisk attachment. (you can also use a hand held mixer but it will take longer.) WHISK that butter and sugar like CRAZY. On medium-low speed. WHISK LIKE MEDIUM CRAZY! This will take at least 5 minutes- you want the butter and sugar to be super fluffy, one entity, not grainy.

whoa, crazy

When the paste is completely cool and the butter is creamy, slowly add the paste into the butter with the mixer running. Now, mix like crazy again until the frosting is crazy fluffy, like whipped cream. It should be smooth and luxurious, with no hint of wanting to separate.

Once frosting nirvana is achieved, add the vanilla and taste it. Taste the possibilities. Now, add the espresso, a little at a time, until the taste you want is achieved. You may have to stop and scrape down the sides occasionally.


When the cake layers are completely cool, join the cake with the frosting in wedded bliss and enjoy. If you make this divine frosting, please let me know how it turned out for you in the comments.

Do you have any secret, colossally awesome cake or frosting recipes I should know about?

Friday, February 4, 2011

Perfect Rice Pudding


Hello friends, and welcome to Pudding Time with Mikaela. I mean...welcome to the Fox Fix. Because we make other things besides pudding here. Sometimes.

I don't mind telling you that I love rice pudding. In the vast world of rice pudding, I hold two puddings in very high esteem: Kozy Shack for its chilled custardy goodness, and Rice to Riches, for its mod decor and abundance of flavors. The thing these two puddings have in common are a creamy consistency with enough structure to allow piling of rice pudding high on the spoon.

And now for a shocking confession: I have never encountered a home-made rice pudding that meets these standards. They're always a little dry for my taste. In college, I went through gallons of milk and tons of rice in search of pudding perfection, puzzled at my roommates' pleas for health food. "What on earth is unhealthy about milk and rice?" I asked. Half the world survives on it, after all.

And so I'll say it again: I have never encountered a home-made rice pudding that met my standards of excellence.

That is...UNTIL. NOW.


Bumbadummmmmmmm! I'm so very excited to reveal that I have met my pudding match! After countless hours grueling over hot stoves stirring simmering pots of sweet rice, of tempering eggs and counting rice grains, I have found you rice pudding.

Recently I have been thinking that the secret to perfect pudding would be gobs of egg yolks and excessive cream, and while that didn't bode well for my fitness goals, I was willing to make the sacrifice just to finally know the answer. Well, fortunately for you and me, the answer is much simpler than that. And less caloric. It turns out grandma really did know best. See, I realized my problem was a matter of ratios- I was trying to cook waaaayyyy too much rice in my milk, which is why the leftovers always hardened into a solid mass in the fridge. Don't underestimate the power of the rice. A little goes a looooong way.

It's important to choose the right kind of rice- the wrong kind won't have the right texture and even worse, won't thicken the milk. Use a medium or short grained rice- arborio or sushi rice are perfect. I use sushi rice because it's easy to find in the international aisle of the grocery and is cheaper than arborio. I love the results.


After much experimenting, I present you with the recipe. It takes a bit, but it's soooo worth it.

4 cups whole milk (surprisingly, with this recipe, even lower fat milks will work, though I wouldn't use exclusively skim. Because we have both in the house, I usually use 3 cups whole, one cup skim)
1/2 cup sugar
1 beaten egg
dash salt
1/3 cup sushi rice (or arborio or other short or medium grained rice)
1 t vanilla extract
optional cinnamon stick or ground cinnamon.

Combine the milk, sugar, beaten egg and salt in a large saucepan and mix thoroughly. Heat over medium heat until the milk is almost simmering. Then add your (seemingly measly but actually perfect) 1/3 cup rice. Stir. Reduce heat to very, very low. You want the surface of the mixture to be moving faintly but not boiling. Now you wait. And stir.

Continue cooking the mixture, stirring about every 5 minutes, for 45 min to an hour. It usually takes me about 50 minutes. Remove the pudding from heat when it is thickened but not to the point you'd like it to be when you eat it. It still needs to be a little loose. I tried to take a picture of the perfect consistency:

Still a little liquidy, but you can see the rice grains holding their own on the surface when you stir it. Once you remove it from the heat, it will continue thickening. After about 15 minutes just sitting on the counter, this is what it looked like:

Eat your pudding warm or place it in a covered container in the fridge. It won't chunk up on you! It's delicious cold too! This picture was taken the day after I made the pudding:

Still creamy, amazing deliciousness. Perfect consistency. Even better than when I first made it, actually. Simple ingredients were the key.

Also, it's amazing how much milk those rice grains suck up, they practically triple in size.

Also, it's totally doable to double the recipe, but beware doing that, because you may eat all of it.

Go make it! Tell me how it turned out! Did it change your life?